Have you ever had that moment where everything is totally fine, and then it's not. Scrolling across this little picture on Pinterest is what started it all. I loved the grey with the wood tones. Suddenly my beautiful beige walls were pretty much yellow, and so boring. Instantly I can't stand it, and I need something new. My living room furniture was already stained wood, a darker version, but I like dark. I knew a grey accent wall at the end of our long townhouse main floor was what I wanted to do.
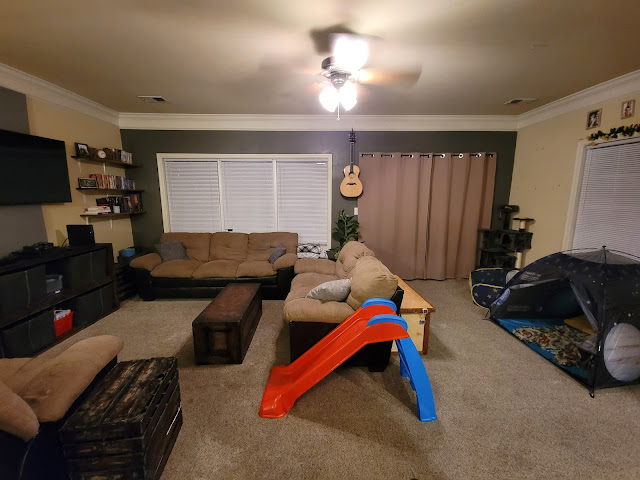
Our townhome was long and narrow, my hope was that the far accent wall would shorten the space and make it feel cozier.

I used the editing app on my phone to "paint" the wall with a grey color. The paint tool set to 50% let me still see the wall through to help give me a better idea of how it would really look. This confirmed my choice. The entire house was the same color, and since I knew this was not our forever home, I didn't want to paint everything. This small wall would make a big difference in the style of our home.
Recently my husband and I decided we could stay in this house until our baby was about 5. Then we would see where we are in our careers and decided if this town, was where we were building our forever home. 4 more years was a long time, so it was worth the investment to make some changes.
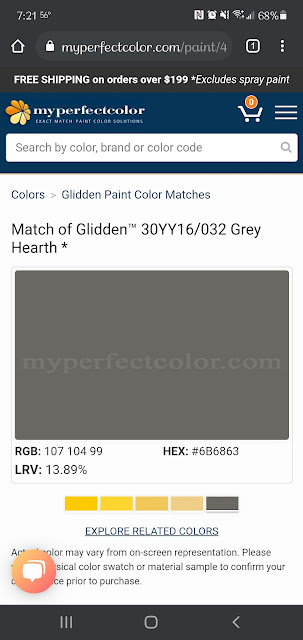
I spent a lot of time trying to pick a color. There are so many shades of everything out there, which makes deciding feel impossible. I started with colors on the manufacture's website. Utilizing their tools for color scheme, helped narrow down what I wanted. I also Stopped by the paint stores to look at color chips. When I thought I liked a color I would then turn to google, Pinterest, and Instagram. Typing the color name into the search bar helped with finding real world examples. If I can tell you anything, it is that the color online, the color sample chip, and the color on the wall are 3 different colors. Unless you're my husband, who says they're close enough.
I knew I wouldn't go this dark, but I really like the greens and blues with the tans that this pallet generator came up with. coolors.co
One sample spot later, I knew it was the right pick. Oh, look at that lovely tree. Where did that come from, you ask? Well, while I was spending all that time looking at colors, gathering sample chips, and 2nd guessing all my choices, I worked on some other living room projects.
This is where we started. Being a family of 6 in 1800sqft, your living space is also the play space. When there is mess, the mess is everywhere.
The best method for a good clean was just to pull all my son's toys out into the kitchen and start with an empty space. This allowed me to clean thoroughly before finding a home for all his things.
Proof it was clean, a few hours from where I began.
I found some throw pillow covers that matched our recycle bins fairly well, so those got a much needed upgrade.
I went a shade darker for our smaller pillows. They added another variety of color and texture to the room. (all items from amazon: Kitchen Bin, Matching Case, Smaller Case)
Hiding the wires behind our tv was next on the list. I googled ways to hide tv wires and came across this picture which was something I had never seen before.
I got out my trusty "paint" feature on my phone, and by the next day I was off to the store. I went with this fabric from Hobby Lobby. Playing off the Color.co pallet from earlier this felt like a good blue tone. I measured before I left to see what size canvas would cover the space with the wires. I grabbed two stretched canvas and enough fabric to cover them. At home, I just stretched the fabric right over the canvas and used a staple gun to attach it on the back. We hung one above the tv and one below to give it the appearance of one full piece.
This was a big improvement. Now it was time to do something about this toy situation.
Since my one-year-old couldn't care less about where anything goes, throwing everything into big bins was a better move.
Bins are from Target and can be found HERE.
I scoped out a few options for a fake tree that were not too outrageously priced. I very specifically need 4' to fill the empty space under the guitar in just the right way. A find from QVC and a basket from Amazon to cover the base worked out beautifully. Always look at the review photos to see what something look like in real life. Fiddle Fig Leaf Tree Found Here. Basket Found Here.
It looked even better once we got the color on the wall. Pulled in the green from my desired pallet.
We reorganized our board game pantry, and I found some new shelves for the Harry Potty display. (found here)
What a difference painting one wall and upgrading a few items made. I didn't keep a running budget, but everything was under $500 and worth all the planning and effort. It was such a joy to walk in the door and see this space everyday. Not every one would have gone for this dark a color, but I'm so happy I stayed true to what felt right.


Comments
Post a Comment